Embedded LED Solar Road Stud Light Installation Guide
DATE:2022-11-07
Read:
SHARE:
LED Road Stud Solar Powered, also known as cat's eyes, can effectively reduce traffic safety hazards caused by line of sight problems and can guide the direction of the road at night as well as in bad weather conditions such as rain and snow. Solar-powered LED lights can reduce the pollution of the environment and the cost of labor for later product maintenance. In foreign countries, the use of road studs is becoming more and more common, and people's travel is increasingly inseparable from the help of road studs. On the road spikes, there are many issues that need to be understood by users, such as the types of road spikes how we choose; which can simply be used as a road decoration but do not need so much load-bearing capacity; which are lightweight and compact color variety; solar road spikes of many kinds, then we will focus today to explain the embedded solar road studs NK-RS-X5 this hot product is how to install it!
To install a road stud light is the premise that we first need to know which roads this solar nail can be applied to, NK-RS-X5 these LED road studs products can generally be installed in the motorway (highways, expressways, skyways), city roads, car parks, and some other public occasions, can be used to decorate the road, can also be used to embellish certain attractions of public occasions. The spikes have a life expectancy of 3-5 years and can withstand temperatures of up to 75 degrees Celsius and -25 degrees Celsius, with a load capacity of up to 40 tonnes.
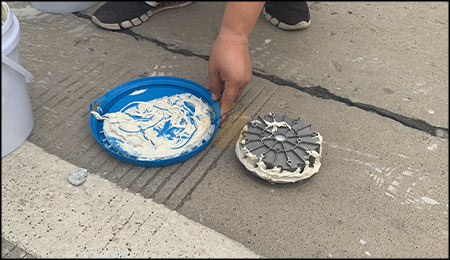
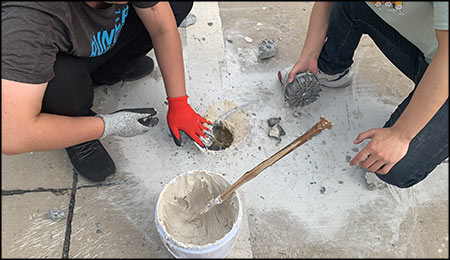
How to install the raised solar-powered road studs. Carefully mark the distance at which the solar road spike light is to be installed. To prevent a negative impact on the ground, use a suitable tool such as a core drill. Drill in 35 mm to a depth of 55 mm. Remove all debris from the mounting holes. Pour the epoxy into the hole according to the manufacturer's instructions. Verify that the mounting hole is straight. Verify that the mounting hole is large enough to allow the epoxy to surround the solar pavement spike shaft.
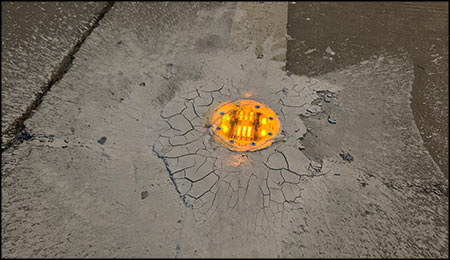
Set the illuminated side of the Solar Road Spike to the desired viewing angle. Verify that the epoxy adheres evenly to the mounting holes and the solar road stud shaft. Verify that the bottom of the Solar Road Spike is firmly mounted to the mounting surface so that there is zero surface float; occurs. (space between the mounting surface and the bottom of the solar road marker). Allow the LED solar road stud to cure for 6-8 hours and then remove the installation barrier. The recommended spacing between each solar road stud is as follows. Highways and Motorways 7 - 8 yards (5 - 6 meters) Dangerous entrances and exits 4 - 5 yards (2 - 3 meters) Entrance or exit routes to hospitals, car parks, etc. 0.5 - 3 yards (0.5 - 2 m) The spacing between each solar stud is also dependent on your actual application requirements, the above values are for reference only.
NOKIN TRAFFIC has been exporting solar road studs for more than 20 years, NOKIN TRAFFIC is the manufacturer of solar road studs in China, we have advanced production equipment and an international management concept, now NOKIN TRAFFIC has five product patents, and all products have passed CE ROHS FCC certification, in line with the European and American countries ASTM D4280 & EN1463-1 standards. The quality of its products has won praise from customers at home and abroad. NOKIN solar road studs are widely used in highways, parks, gardens, harbors, crossroads, island walkways, piers, decks, etc. We create smart solutions and focus on solutions for road safety, NOKIN is always there to keep you safe. We look forward to working with you!