Solar-powered road studs, as active lighting traffic warning facilities, derive their core value from their ability to guide road contours in low-visibility environments such as at night or during rain and fog. However, in actual applications, many projects have experienced issues such as stud detachment, lighting failure, or reduced lifespan due to improper installation. For example, on a certain highway section, insufficient drilling depth led to 30% of the studs being crushed and damaged within one month of the road opening; on a certain urban road, incorrect adhesive mixture ratios caused widespread stud detachment during the rainy season.
It is clear that proper installation methods are a prerequisite for solar road studs to perform effectively. This article will systematically dissect the two mainstream installation methods — surface mounting and core drilling — and provide detailed standards for the entire process from safety preparation to post-installation maintenance, helping construction teams achieve the goal of “one-time installation and stable operation for 3-5 years.”
Construction safety is the prerequisite for all operations, especially when working on open roadways. The following regulations must be strictly followed:
Place plastic cones 5-10 meters from the edge of the construction area to create a closed work zone. If working on a highway, use warning signs and traffic controllers to ensure vehicle safety during “construction while traffic flows.” Cone spacing should be ≤1.5 meters to form a continuous visual barrier.
All construction personnel must wear reflective vests (reflective strips ≥5 cm wide), anti-slip work boots, and protective gloves; alcohol consumption is strictly prohibited within 6 hours prior to construction, and horseplay within the work area is strictly prohibited. The construction team leader must inspect equipment condition (e.g., insulation of drill machine and mixer cables) in advance to prevent accidents caused by mechanical failures.
The installation effectiveness of solar road studs directly depends on the road surface foundation conditions, which must be strictly controlled in terms of flatness and cleanliness:
Use a 2-meter straightedge to inspect the installation surface, with an error tolerance of ≤3 mm; if there are depressions or protrusions, they must be filled and leveled using specialized road stud repair adhesive (compressive strength ≥30 MPa). Special note: It is strictly prohibited to install road studs on road expansion joints to prevent temperature changes from causing road deformation that could compress the road stud housing.
|
Road Surface Type |
Cleaning Method |
Core Purpose |
|
New cement road surface |
Use a wire brush or angle grinder to remove the surface slurry layer (approximately 1–2 mm thick) to expose the solid base layer |
Prevent slurry peeling that could cause road stud loosening |
|
Old asphalt road surface |
First, use a high-pressure water gun to rinse off oil stains and sand, then use a wire brush to grind the surface, and finally use compressed air to dry the moisture |
Improve the adhesion between the adhesive and the road surface |
|
Road surfaces in icy/snowy weather |
First, use de-icing agents to remove ice, then use a hot air gun to dry the surface (temperature ≤60°C), ensuring the moisture content is <5% |
Prevent moisture from affecting the curing of the adhesive |
The installation method for solar road studs should be selected based on traffic volume and load requirements. Currently, the mainstream methods are surface installation and core drilling, with the following applicable scenarios and operational details:
Surface installation fixes the road stud directly to the pavement using adhesive, without damaging the pavement structure. It is suitable for areas with low traffic volume, such as sidewalks and rural roads (average daily traffic volume < 500 vehicles).
Use a steel brush to repeatedly scrub the installation point (area ≥ 1.5 times the base of the stud) to remove loose particles. If there is oil residue, apply a small amount of alcohol to wipe it off (wait for the alcohol to evaporate before proceeding). Finally, use compressed air (pressure ≥ 0.6 MPa) to blow away any remaining dust, ensuring the surface is free of visible contaminants.
The solar stud-specific adhesive is a two-component system (Component A is epoxy resin, Component B is the hardener), and the quality of the mixture directly affects the bonding strength:

Core drilling involves embedding road studs into holes drilled in the roadway, providing stronger resistance to vehicle crushing. It is suitable for high-traffic areas such as highways and urban main roads (with an average daily traffic volume exceeding 5,000 vehicles).
After drilling, use a specialized hole cleaner (a long rod with a brush) to remove debris from the hole, then blow out the hole with compressed air 3-5 times to ensure no dust accumulates at the bottom; if loose concrete or asphalt is present on the hole walls, remove it with a small chisel to prevent future detachment causing the track stud to loosen.
|
Comparison Item |
Surface Installation |
Core Drilling |
|
Application Scenarios |
Sidewalks, rural roads |
Highways, urban main roads |
|
Construction Time |
Approx. 5 minutes per stud |
Approx. 15 minutes per stud |
|
Road Surface Damage |
None |
Requires drilling (hole diameter 88–100 mm) |
|
Rear-End Resistance |
Under 20 tons |
Over 30 tons |
|
Post-Installation Maintenance Difficulty |
Easy (studs can be directly replaced) |
Moderately difficult (holes must be cleaned before reinstallation) |
|
Material Cost |
Low adhesive usage (approximately 20 g per unit) |
High adhesive usage (approximately 50 g per unit) |
Regardless of the installation method used, the following steps directly affect the functional stability of solar road studs and must be strictly followed:
Most solar road studs are independently powered (solar panel + battery) and do not require wiring; however, some smart networked models require connection to signal lines (such as 2.4G wireless modules):
Comprehensive testing must be conducted after installation to identify any latent faults:
The lifespan of solar road studs (3-6 years) depends not only on product quality but also on post-installation maintenance. The following points should be given special attention:
|
Maintenance Item |
Operating Method |
Judgment Criteria |
|
Solar Panel Cleaning |
Wipe the surface with a soft cloth dampened with clean water to remove dust and bird droppings (do not use corrosive cleaners) |
No visible stains on the surface, light absorption rate ≥90% |
|
Adhesive Layer Inspection |
Inspect the adhesive layer around the track stud edges for cracks or peeling, and gently push the track stud to check for loosening |
No cracks, no loosening, adhesive layer tightly bonded to the road surface |
|
LED Lighting Inspection |
Observe the brightness (≥2000 MCD) and uniformity of the lighting at night, and record the locations of any track studs that are not lit or show flickering |
Stable lighting, no dark areas, no flickering |
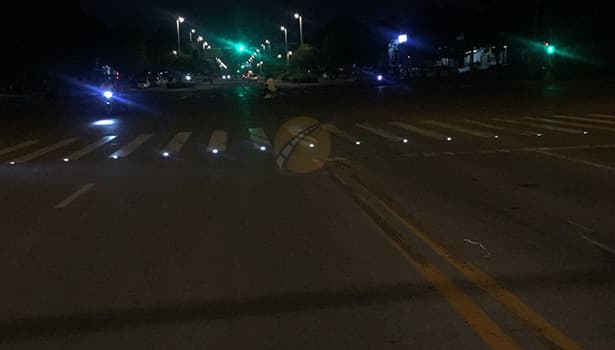
The “active lighting” advantage of solar road studs can only be fully realized through scientific installation — precise drilling depth, uniform adhesive application, and strict curing time control. Every detail determines their stability over a 3-5 year service life.
For construction teams, selecting installation methods suited to the application scenario (surface installation for light traffic, core drilling for heavy traffic) and adhering to standardized procedures not only reduces rework rates but also ensures the warning effectiveness of the studs in complex environments such as at night or in foggy conditions, providing continuous road safety protection.
If you require customized installation solutions or wish to purchase high-compatibility solar road studs, please feel free to contact us. We offer comprehensive support from product selection to on-site guidance, ensuring that every road stud becomes a reliable “road safety sentinel.”